Anatomy 101: 8 Poses to Strengthen Your Wrists + Prevent Injury
Originally Published on yogajournal.com by Ray Long, MD
Each time you vinyasa your wrists bear weight. Without the proper support, this can lead to injury. Use these poses to help build strength in your wrists and core.
The key to protecting your wrists is—surprise!—a strong core. Evidence-based medicine demonstrates that a strong core can increase the efficiency of your rotator cuff muscles, which stabilize your shoulders, and decrease the load that is transferred to your wrists. Picture the ubiquitous Down Dog–Chaturanga–Up Dog-Down Dog sequence. Each time you repeat it, your wrists bear weight throughout. Over time and without proper support from the core and shoulders, this can lead to injury.
Use this simple four-step program to strengthen your core, rotator cuff, and wrist muscles. Step four integrates steps one through three into Down Dog. Ease into all of these poses using smooth gradual engagement of the muscles. Prepare the body in this sequential way, maintain awareness of the core-cuff-wrist connection, and infuse these actions into every vinyasa to keep your wrists healthy and pain-free.
Note: People with wrist pain should consult a medical professional. Avoid weight-bearing in the wrists until pain subsides.
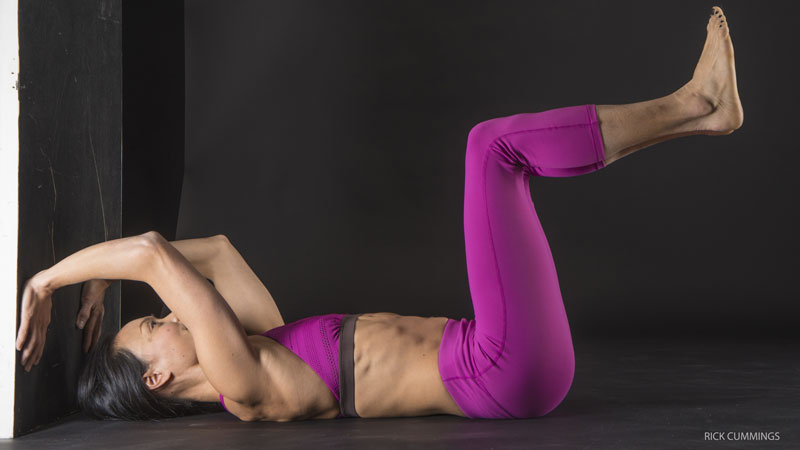
1. Strengthen Your Core: Happy Baby Pose, variation
Ananda Balasana, variation
This variation will wake up your core.
Lie on your back with your head about one foot away from the wall, feet toward the center of the room. Raise your arms overhead with your elbows bent and place your palms against the wall, fingers pointing down. Flex the hips and knees to 90 degrees in reverse tabletop position. On an exhalation, use the abdominals to straighten your right knee and lower your right foot toward the floor. Bring the foot back up and repeat on the left side. Do 10 rounds.
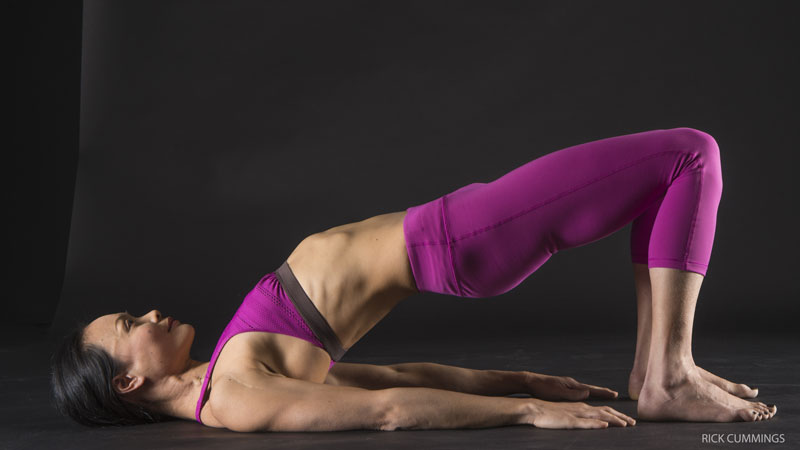
2. Strengthen Your Core: Bridge Pose, variation
Setu Bandha Sarvangasana, variation
Strengthen your gluteal muscles while you energize your core with this gentle backbend.
Begin on your back with your feet slightly wider than your hips and about 4-6 inches away from your buttocks. Let your arms rest on the floor, palms down. Press your hands and feet into the floor. Gently attempt to drag the feet apart without movement. Keep the knees over the heels, engage the gluteus maximus, press into the feet, and exhale to raise the hips. Inhale to lower the hips and back all the way to the floor. Begin with 2-3 sets of 10 repetitions, eventually building to 20 repetitions each set. Rest between each set.
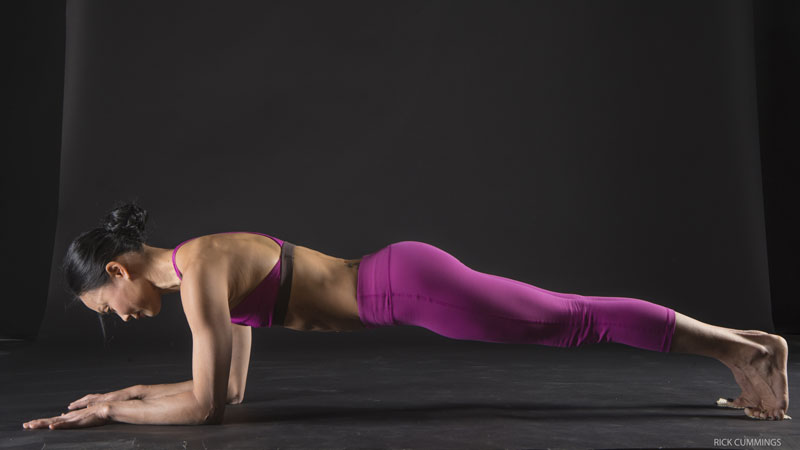
3. Strengthen Your Core: Forearm Plank
Forearm Plank will strengthen your abdominal core in concert with your gluteus maximus muscles.
Start lying down with your forearms on the floor, elbows under your shoulders. Lift your whole body so that it forms a straight line from head to heels. Attempt to drag your forearms toward your feet without movement, while contracting your gluteus maximus slightly to move your tailbone toward your heels. Continue to breathe at your resting pace and hold for 10 seconds. Exhale to lower. Repeat 2-3 times.
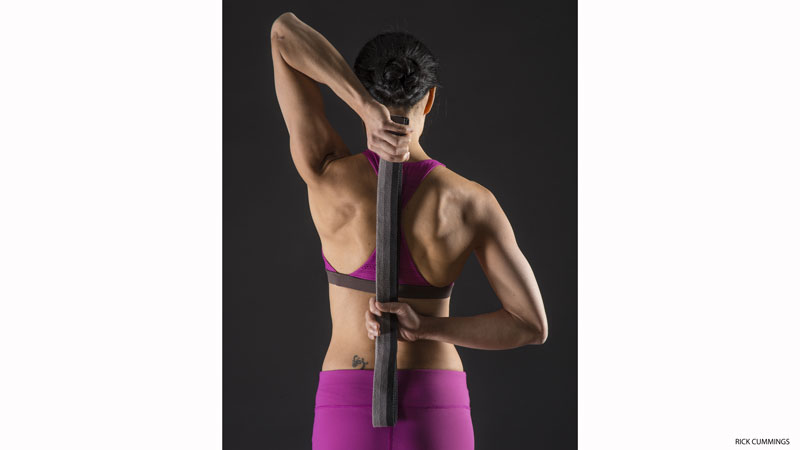
4. Activate Your Rotator Cuffs: Cow-Face Pose Arms
Gomukhasana Arms
Use this stretch to wake up your rotator cuffs.
PART I: Reach your right arm up and bend your elbow so that your fingertips point down your back. Reach your left arm behind your back with fingertips pointing up. Use a belt to bridge the distance between the hands. Focus on one arm at a time. Press the knuckles of the right hand into the back, using less than 20 percent effort. Hold 8 to 10 seconds.
Then gently pull down on the belt with the left hand to deepen the stretch in the right shoulder. Hold for 30 seconds. Switch sides and repeat with the left elbow pointing up.
PART II: Switch the arms again, with the right on top, but this time focus on your left arm. Gently pull the belt with the right hand to draw the left hand up the back. Once you reach a comfortable stretch, draw the left shoulder back and down. Gently press the knuckles of the left hand into the back. Hold 8 to 10 seconds.
Then use the belt to draw the hand a bit farther up the back. Hold the entire stretch for 30 seconds and then switch sides.
Repeat 3 rounds each of parts I and II.
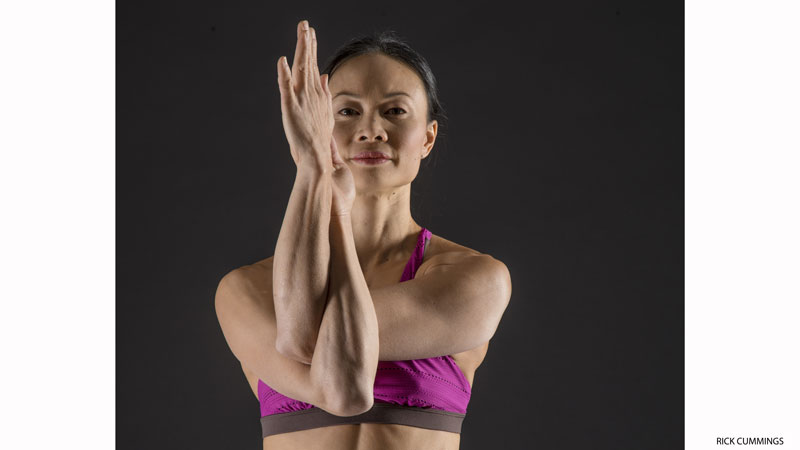
5. Activate Your Rotator Cuffs: Eagle Pose Arms
Garudasana Arms
This stretch improves the strength and flexibility of your rotator cuffs using eccentric contractions, which gently increase tension as muscles lengthen.
Sit or stand. Cross your right arm under your left and wrap your forearms around each other. Gradually raise your elbows to shoulder height and draw your left arm toward the right side to enhance the stretch. Gently press your left elbow into the right. Use less than 20 percent effort and hold for 8-10 seconds. Then return your elbows to shoulder height and bring your arms back to center. Hold for 20 seconds, before starting over on the other side. Repeat for 3 rounds.
NOTE: If you have an injury or chronic shoulder condition, seek the advice of your physician before attempting Garudasana.
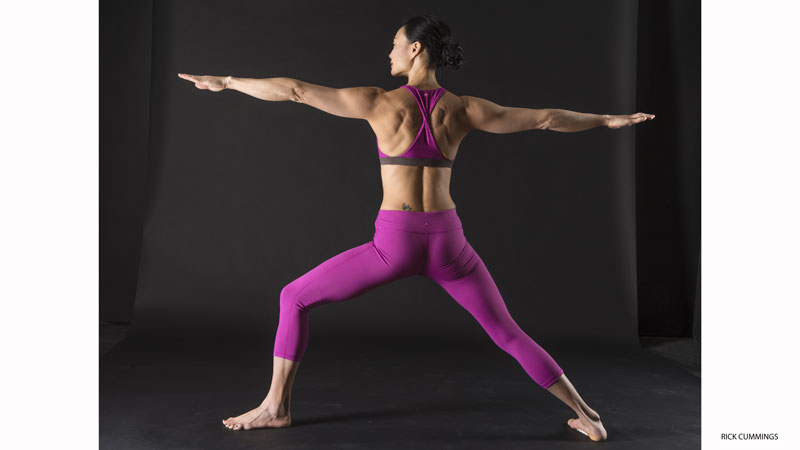
6. Activate Your Rotator Cuffs: Warrior II Pose
Virabhadrasana II
Use Warrior II to create stability in your shoulders.
From Tadasana (Mountain Pose), step the feet about three to four feet apart. Turn your right foot out 90 degrees and bring your other foot parallel with the back of the mat, then turn the left toes in just slightly. Align your right heel with your left arch.
Turn your right thigh out and bend the right knee until it is over the right ankle. Press down through the left leg and outer left heel. Raise your arms to shoulder height and reach out through extended fingers, palms up. Draw the shoulder blades toward the midline and down the back. Roll the shoulders back. Flip the palms down. Hold for about a minute before switching sides.
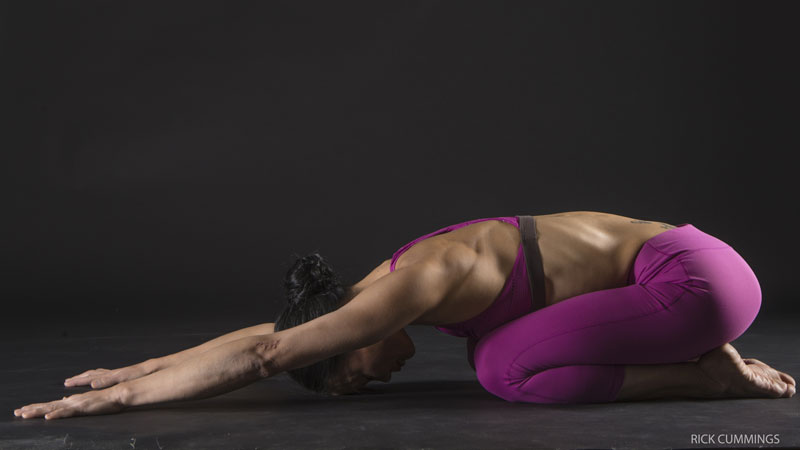
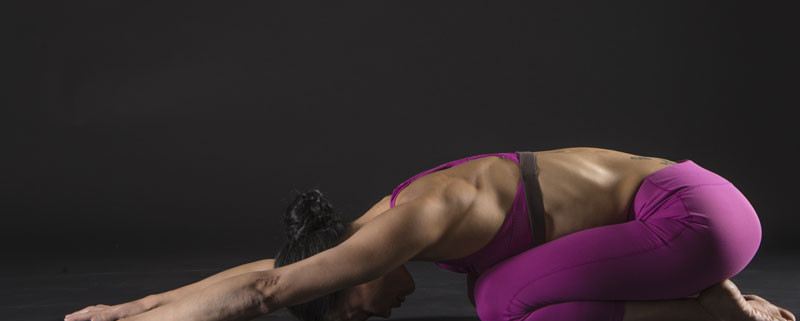
7. Stabilize Your Wrists: Child’s Pose
Connecting your rotator cuffs with your wrists in this pose strengthens the wrists themselves.
Come into Child’s Pose with your knees hip-width apart or together; rest your sitting bones on your heels and extend your arms on the floor in front of you, palms down. Roll your shoulders out and draw your shoulder blades down your back to engage your rotator cuffs. Keep your wrists straight—don’t deviate to the little finger side.
Gently press the mounds at the bases of your fingers into the mat. Note that your wrists lift slightly. This aligns your carpal bones with your radius and ulna. Maintain lift during exhalation and relax on inhalation. You can add very gentle pressure with your fingertips and a slight gripping action with your thumbs, directed toward the little fingers to further stabilize your wrists.
Hold for 5 breaths. Inhale to sit up and stretch your right wrist into extension, holding your palm up and gently pulling your fingers back toward your wrist with the other hand. Hold for 30 seconds then stretch the left wrist for 30 seconds.
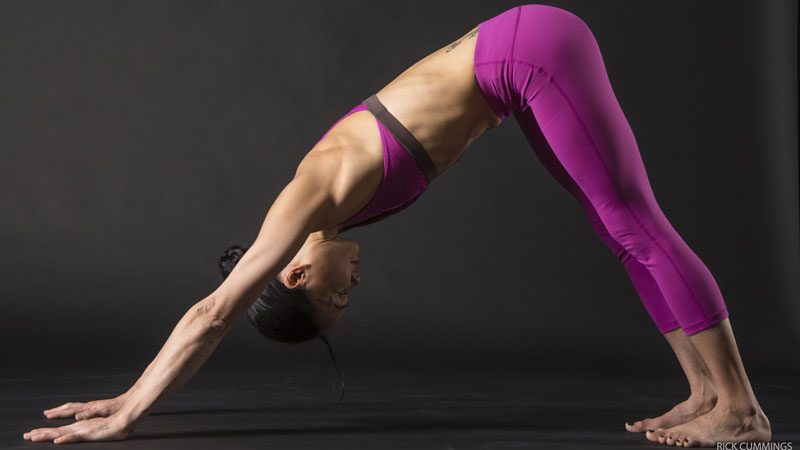
8. Integrate All Actions In Downward-Facing Dog Pose
Adho Mukha Svanasana
From Child’s Pose, press the mounds at the bases of your fingers into the mat to stabilize and slightly lift your wrists. Roll your shoulders out and draw your shoulder blades down your back. Inhale to lift your hips. On an exhalation, sink your heels toward the floor and feel the muscles of your abdomen engage by drawing your belly toward your spine.
Contract your quadriceps to straighten your knees. Finally, attempt to lift the tops of your feet toward your shins, draw your body back toward your heels, and further stabilize your core.

